This post contains affiliate links for your convenience.
Phase 3 is here! It’s time for Mission Organization: Closet Rescue | The Reveal! This project seems like it has been going on forever so I’m so glad to share the finished product with you guys today!


Just to review, here are the goals I had for the space…
- Create a “spot” or home for everything.
- Add a cute curtain.
- Make better use of the vertical space next to the window.
- Pretty it up a little by covering the diaper boxes.
- Add labels to the shelves/boxes to help us remember where everything belongs.
- Figure out a different spot for Mr. Right’s shoes. I removed the shoe divider in his corner because most of his shoes were too big to fit into the holes and it wasn’t a good use of the space.
And just to refresh your memory…here’s where we started.


And now for the afters…


The first step in the process was the most painful. I purged all the stuff that I wasn’t using and didn’t really need! After all the extra stuff was removed and I dusted the shelves and started organizing everything. There was enough room leftover to create a space for extra sheets. I was so glad since we don’t have a linen closet downstairs.

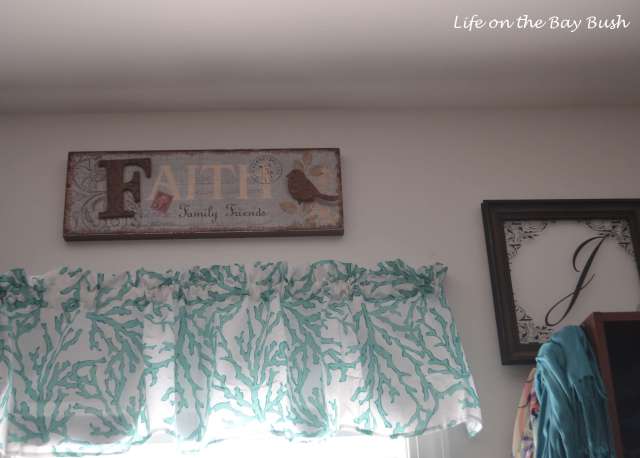
I intended to sew a curtain for the window and heaven knows I have enough fabric in my stash to have made one. But I was running low on time and honestly, I just didn’t feel like dragging out my sewing machine and making one. That’s where my good friend, Amazon Prime, came in. I liked this blue and white coral valance and it was only $12. The fabric is a little thin but I can’t complain considering the price. I also hung two decorative pieces I already had but wasn’t using in there.

To make better use of the space next to the window, I ordered 4 more command hooks and added them above and below the existing hooks.


I also used Tori’s idea for the shower hooks to store the scarves that wouldn’t fit on the command hooks.

I covered diaper boxes with the leftover fabric from my Jewelry Station project from a couple of years ago. I had enough to cover three boxes. I added these Martha Stewart bookplates with a label to make them look a little prettier.

I labeled the shelves like a crazy person real organizer!


Mr. Right’s shoes ended up in the same shoe grid turned on its side and under my shorter dresses. When the grid was in the corner shelving unit, you couldn’t actually fit shoes in half of it because of the way the shelves were made. This way, I re-used the same grid and made it completely accessible!


Finally, I added a little more jewelry storage, using hooks and a little DIY action.
I shared this jewelry hanger that I made in the DIY post.


One thing led to another and I ended up with a whole wall of jewelry storage! I also included a couple of the girls’ paintings and a leftover picture from my DIY Art Wall. (I’m not sold on this one and will probably switch it out as soon as I have another masterpiece ready for display from my girls.)
The DoorKnob Hook was from Young House Love‘s collection at Target a couple of years ago. I found it on clearance back then and just never hung it. The silver hook is actually a bath hook by Moen. It was part of my swag bag at Haven Conference. It is so easy to hang up because it has wall markers built into the piece so you know exactly where to drill holes!

I came up with the idea to add two more command hooks that I already had to the side of my shoe organizer. I found the metal rod that goes between the command hook in my laundry room and I think it may be a spare part to my stove? Who knows? It’s a bracelet holder now! Organizing can be really expensive if you think outside the box about the function of the item instead of the form. I also had a little spring-loaded curtain rod that would have worked for the project but I liked the metal look better.

Finally, I added another painting by McKenna and a little “happy” message above the light switch. The message says, “It’s never to late to have a happy childhood.”

Avery had a little chair in her room that was a perfect fit for the space. Now we have a place to sit down and put our shoes on! It’s the little things, y’all!

Y’all. That wore me out but I’m so glad its done! Check out the before and after!


When all was said and done this project cost less than $40! The only items I bought for the project were:
- The Valance $12
- The Brushed Nickel Command Hooks $14 for 4
- Another pack of velvet hangers $10 for 25 (I really didn’t have to buy these but I found a good deal on them at TJ Maxx and will probably upgrade them slowly over time. They work so well to keep my tops and dresses from falling off the hangers!)
- The glass knobs for my DIY project $3
What do you think? Did you play along? Beth and I are doing a joint giveaway to celebrate the END of MISSION ORGANIZATION: CLOSET RESCUE! There will be one prize from Beth and one from me! That doubles your chances of winning something! You can enter by leaving a comment and subscribing to our blogs! And you didn’t have to clean out your closet to win! You have until Sunday to enter!
Tori is doing a separate giveaway for her closet reveal so be sure to check it out!
p.s. I’m linking up to Home Stories A to Z, What Treasures Await and Tatertots and Jello!